How to edit your photos in 3 easy steps, using Capture One Pro and the Mastin Labs presets
This is a quick guide on how I use the presets from Mastin Labs together with Capture One Pro. I’m no professional editor but I’ve spent many hours getting to know the software since I switched from Lightroom some 6 months ago – but’s it really not that difficult.
It has become much easier and faster for me to edit my food photos with the presets from Mastin Labs. It is a 3-step process and from there I sometimes tweak or adjust some details, like highlights and shadows.
Let’s edit this gorgeous burger and fries with the preset pack Portra Original, which has warm tones and adds medium contrast. It’s also good for portraits and wedding photos.
Shot with an Olympus OM-D E-M1 MKII and M. ZUIKO 25mm f1.2 PRO in natural light.
Settings ISO 500, f1.4 – 1/100s
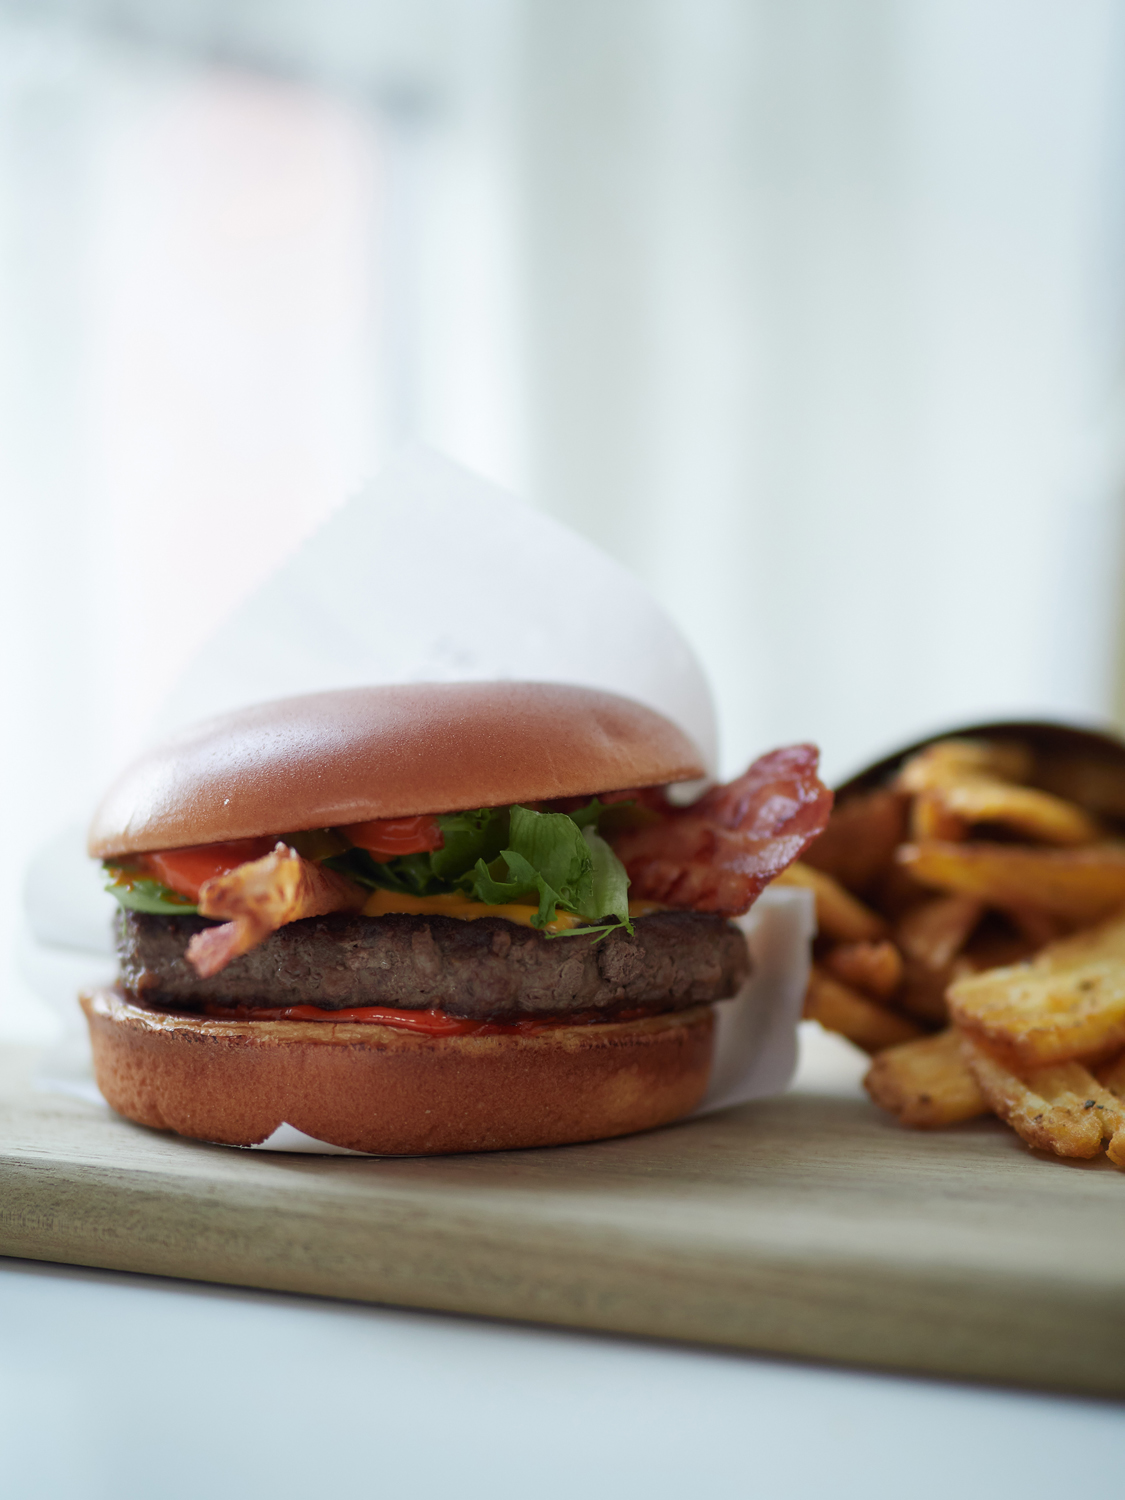
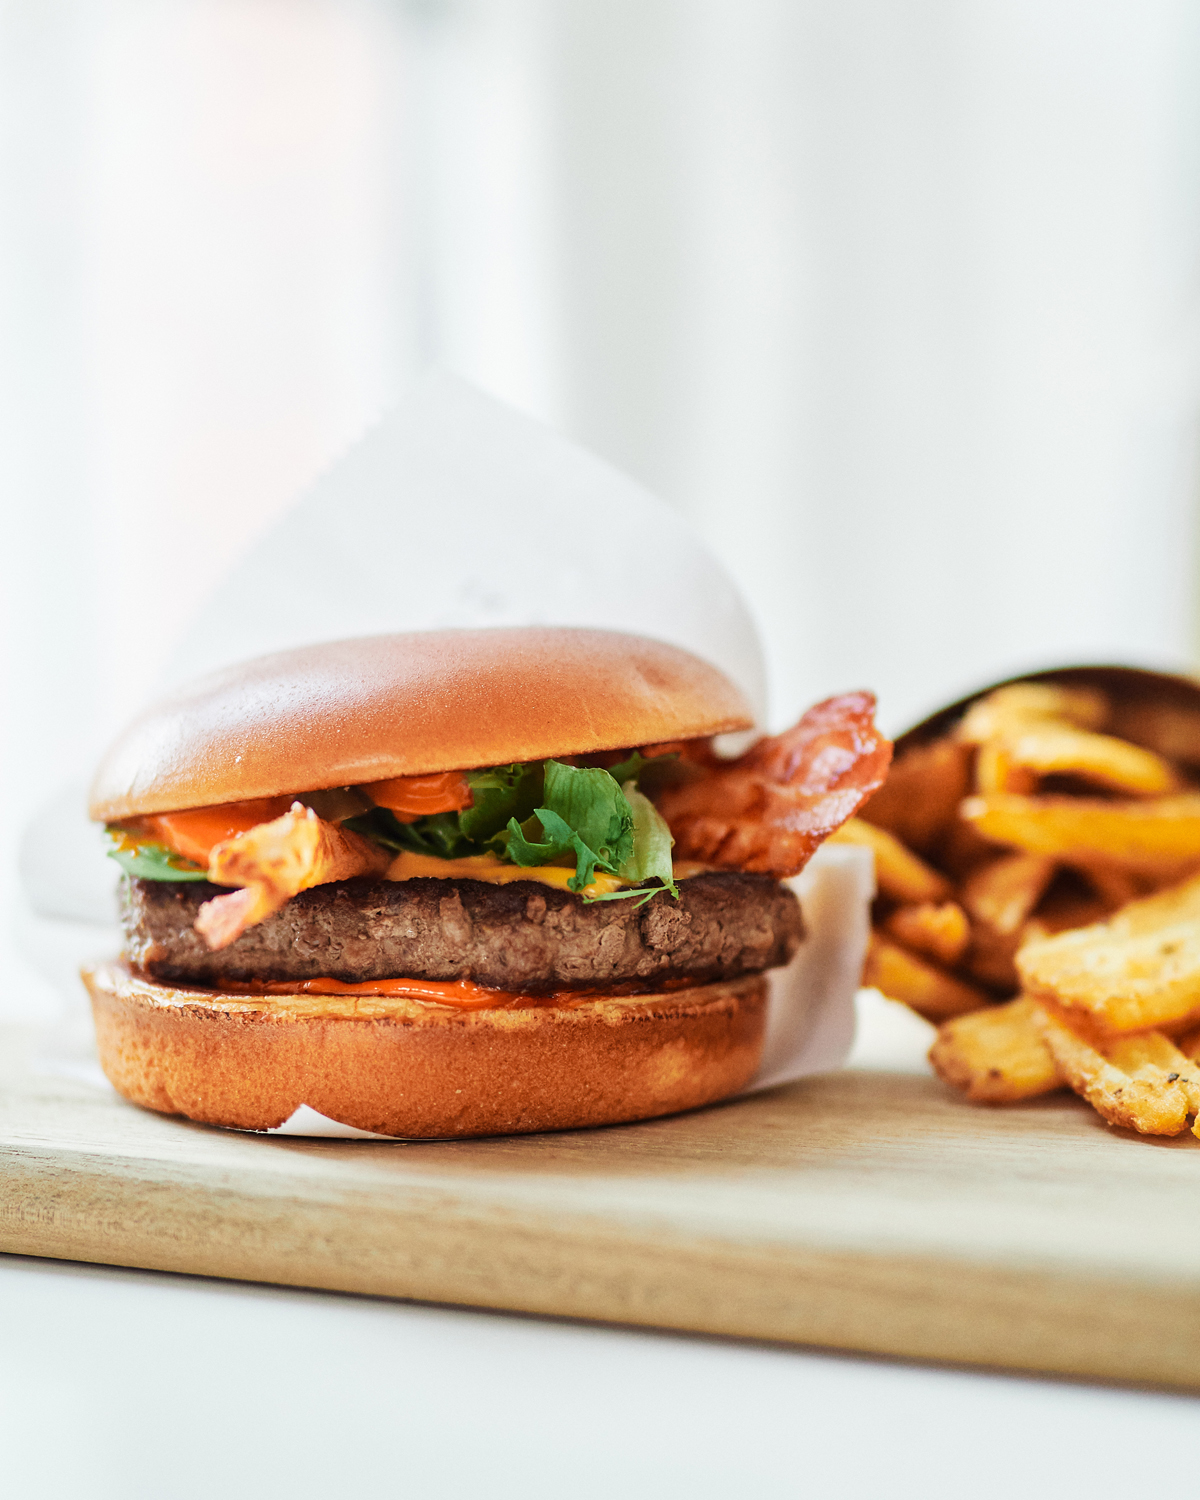
When you buy a preset pack from Mastin Labs, it comes with its own workspace for Capture One, which makes it really easy to apply and adjust the necessary settings. This has become my favorite way of working.
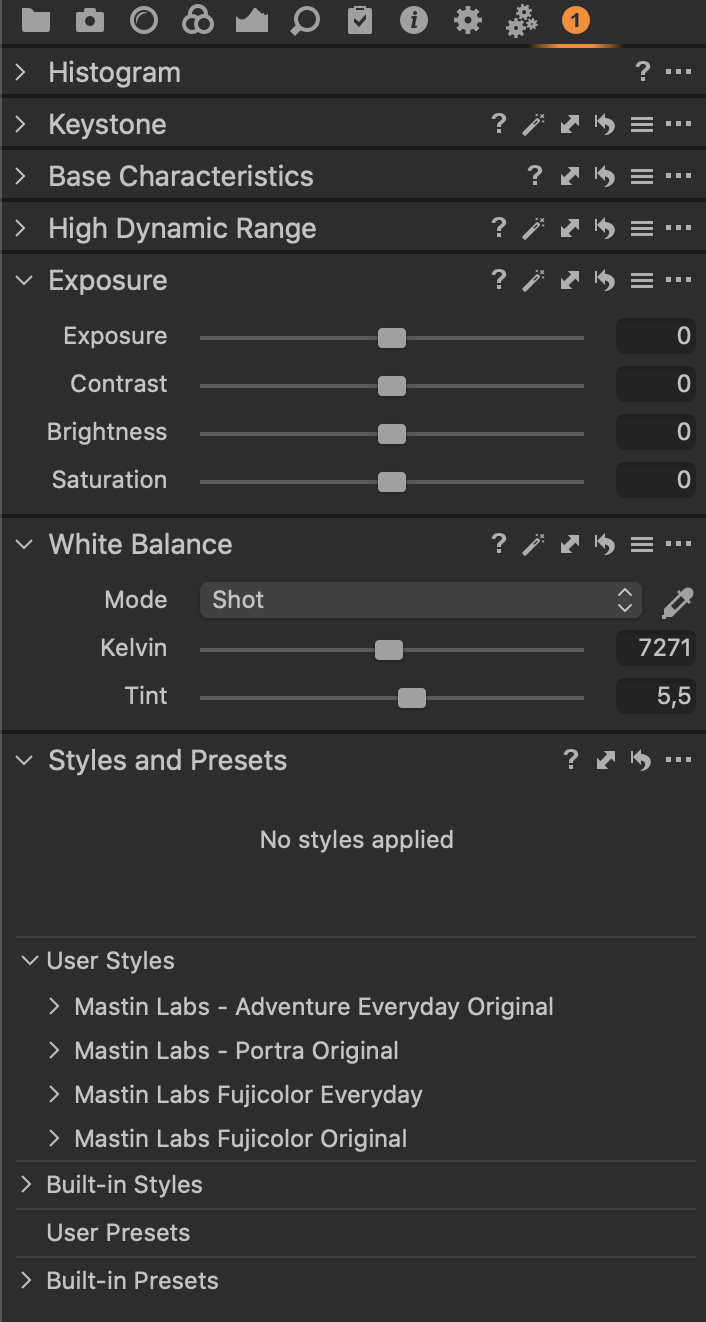
The 3-steps to quickly edit your photo is
1. Apply a preset
2. Adjust exposure
3. Adjust white balance
Which is also the focus of the workspace from Mastin Labs. Each preset pack also gives you the options to adjust the white balance, tone, lens correction and to add grain.
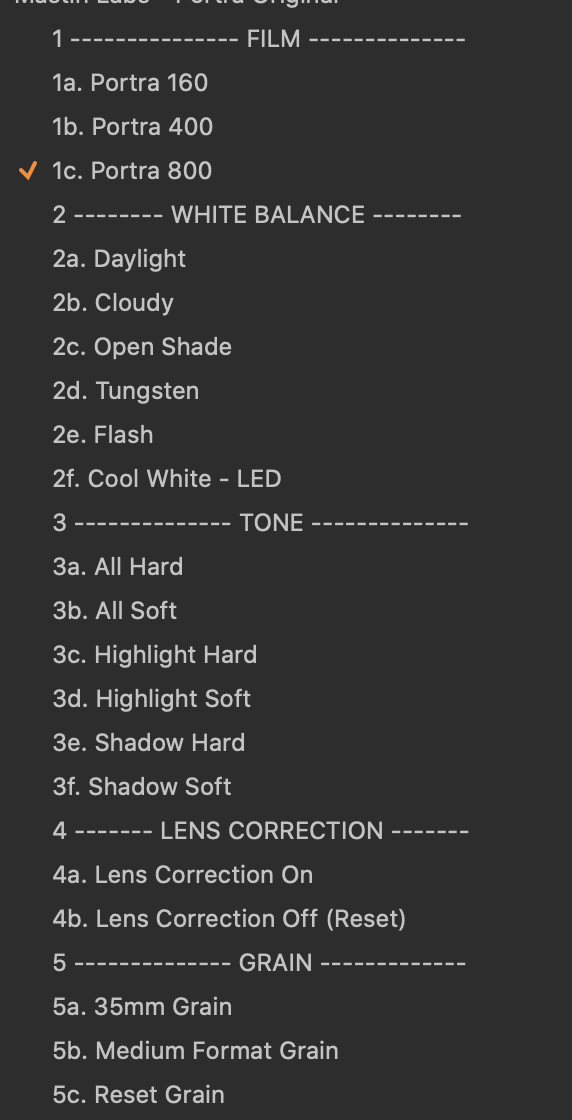
Step 1 – Apply the preset
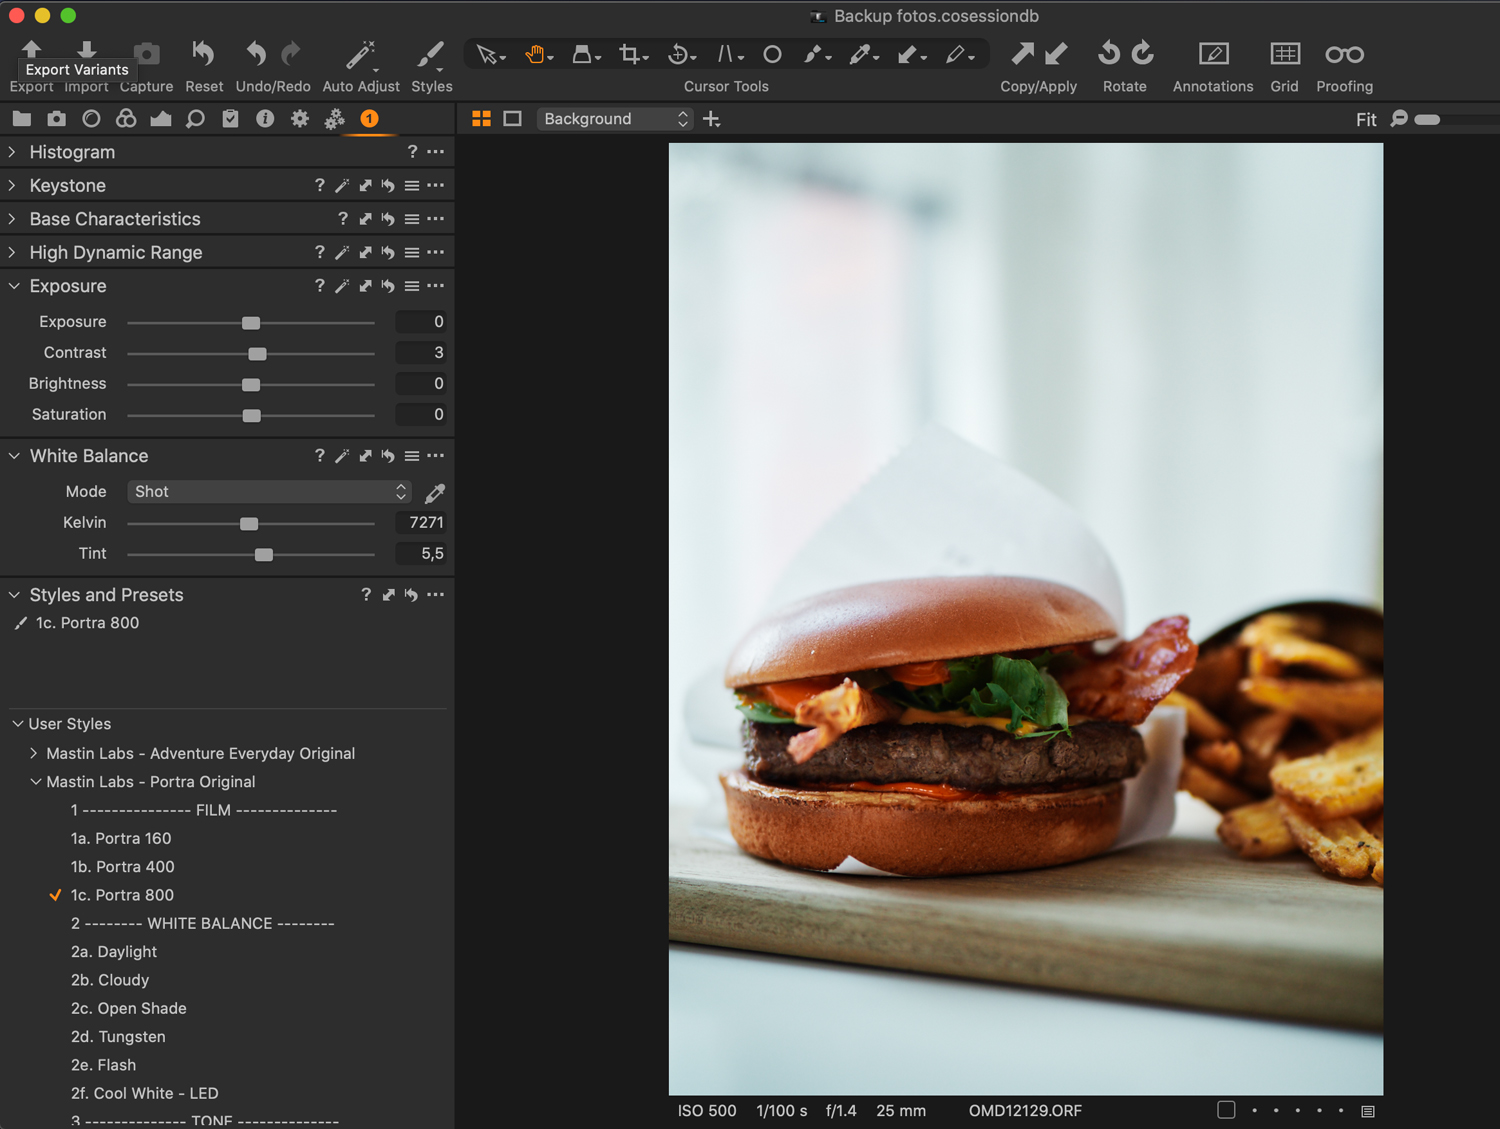
In each preset, you have the option to use some predefined white balance setting or you can use the slider in the “White Balance” section. I prefer to use the White Balance section to adjust Kelvin and tint.
These steps are optional – but I do them every time, it has become part of my style.
Step 1A – adjust the TONE and my go-to choice is “All soft”
Step 1B – Apply Lens correction
Step 1C – Apply grain
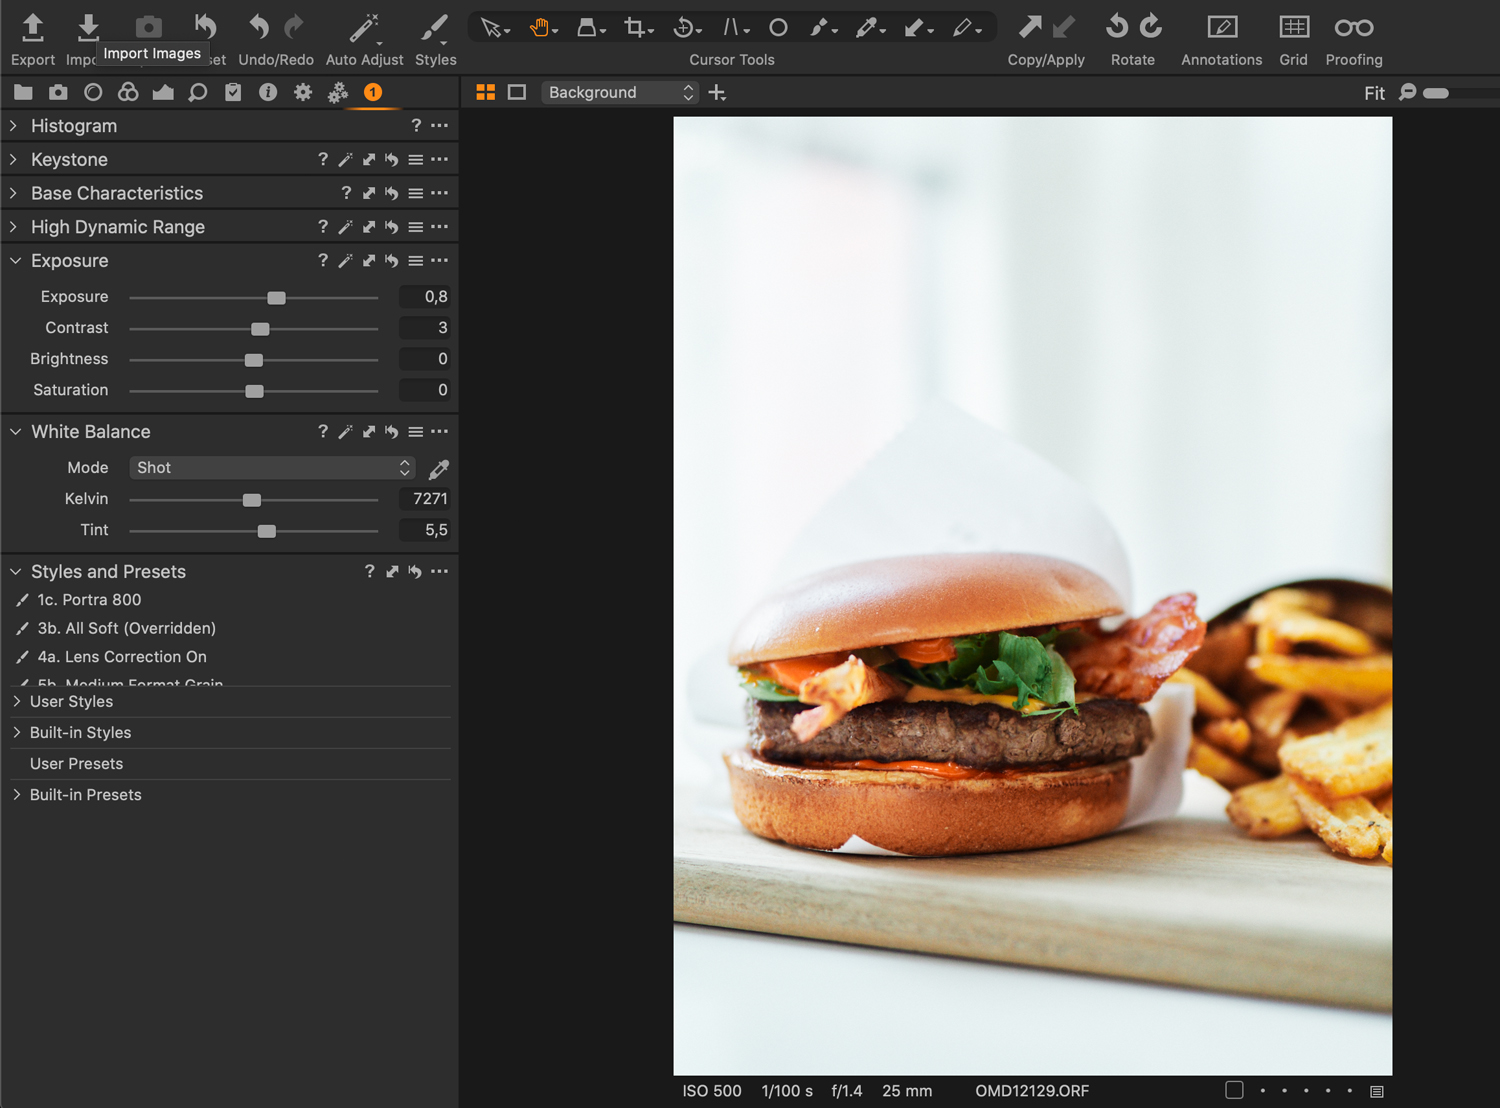
Step 2 – Adjust the Exposure
Using the exposure slider, I’ll adjust until I’m happy.
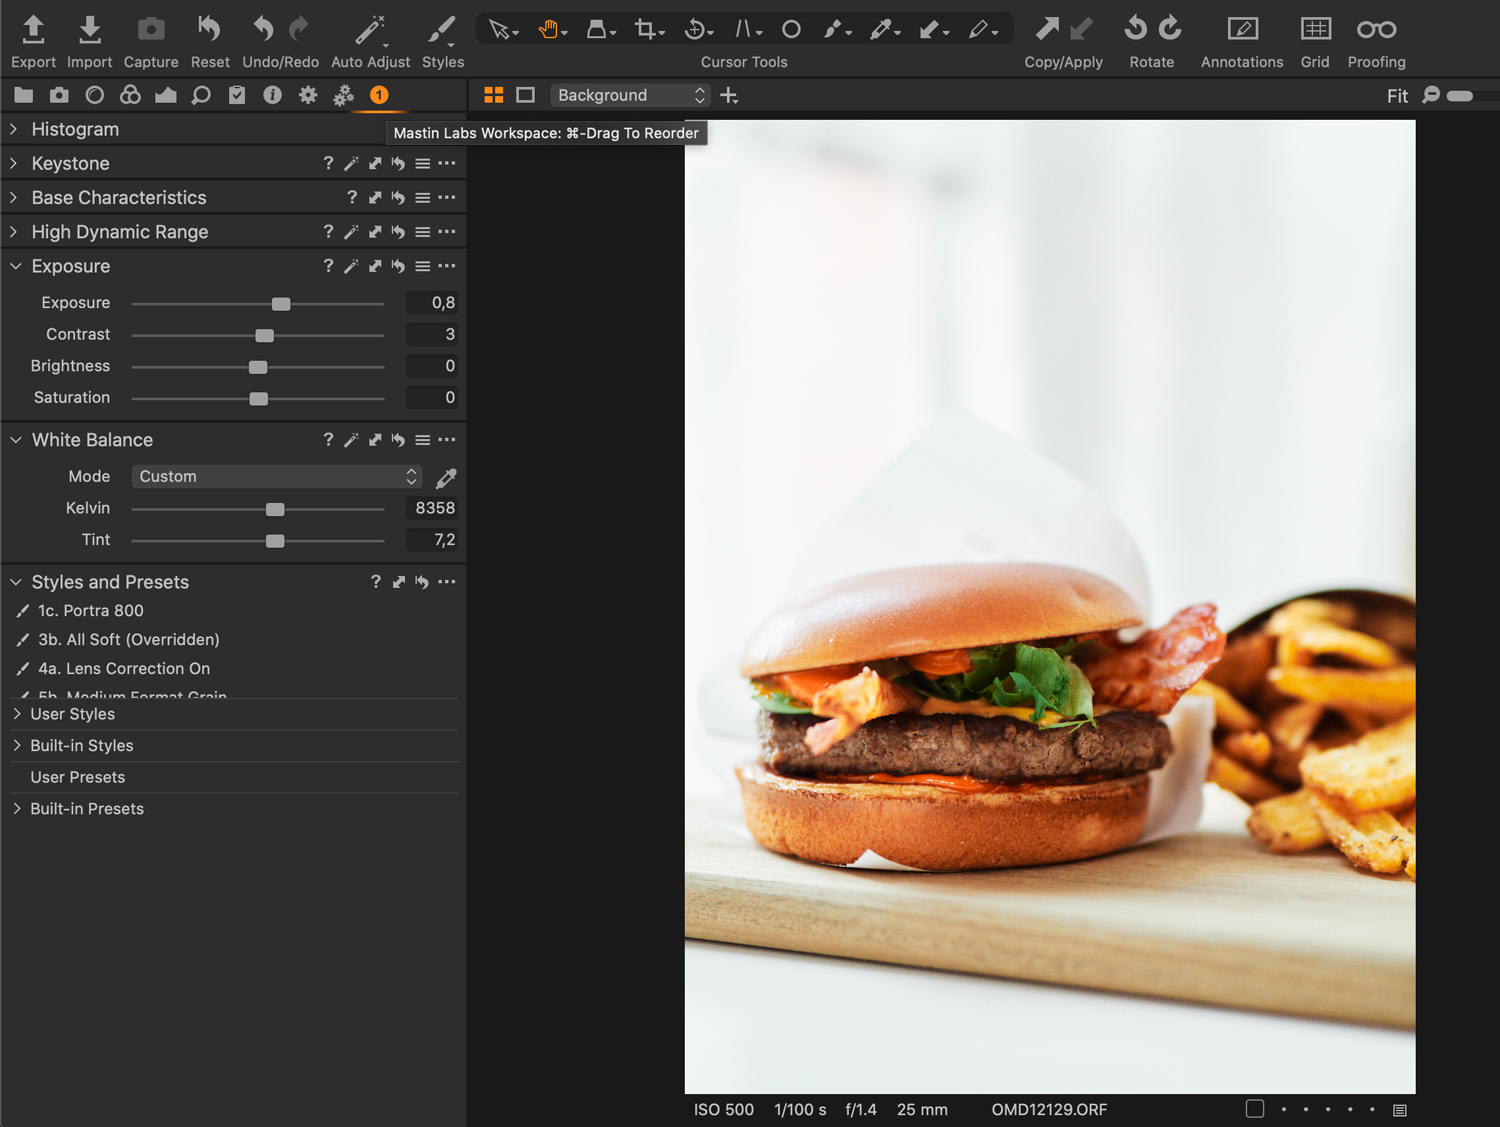
Step 3 – Adjust the White Balance
Again, just using the slider until I like what I see – in this case, I turned it to the warmer side.
Step 3A – I adjusted the tint a little bit
This is it, three quick and simple steps, and I like the picture like it is, but I still need to make some minor changes.
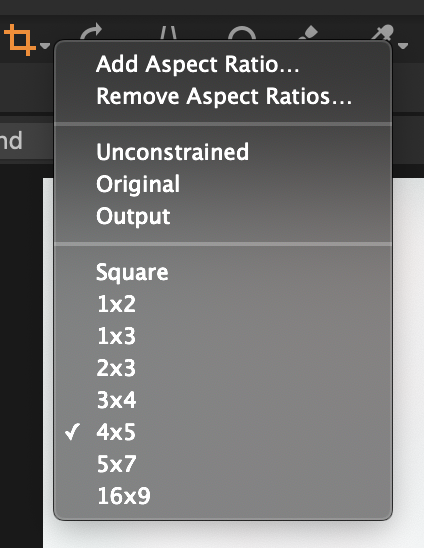
Step 4 – I’ll crop this image for Instagram using 4×5 aspect ratio
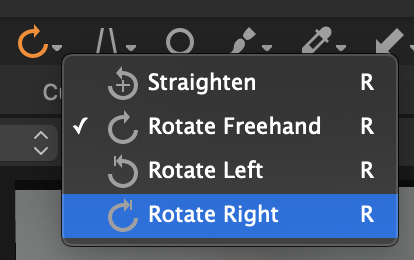
Step 5 – If the picture is a little crooked, I’ll rotate it using the “freehand tool”
And finally, I turned down the highlights and upped the shadow. That did something to background so that the burger was more separated, and the beef got more visible.
Now there’s nothing left to do other than export the image, write a cool caption and post on Instagram.
Happy editing
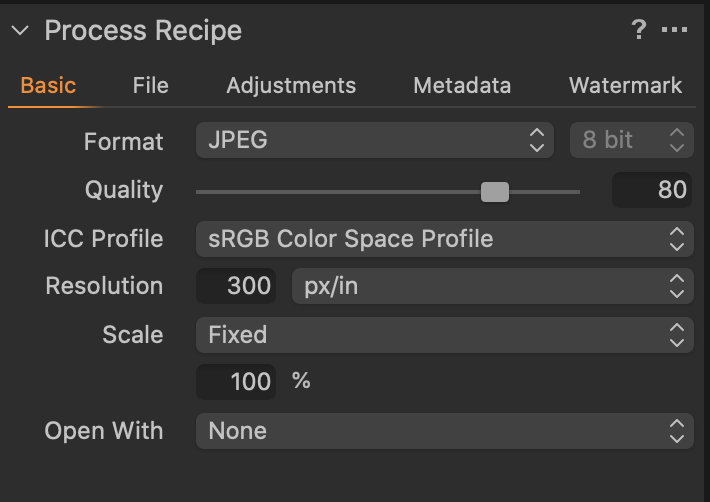
Bonus – My export settings for Instagram
Optional if you want to use it.
1. Format JPEG
2. Quality 80
3. ICC Profile sRGB
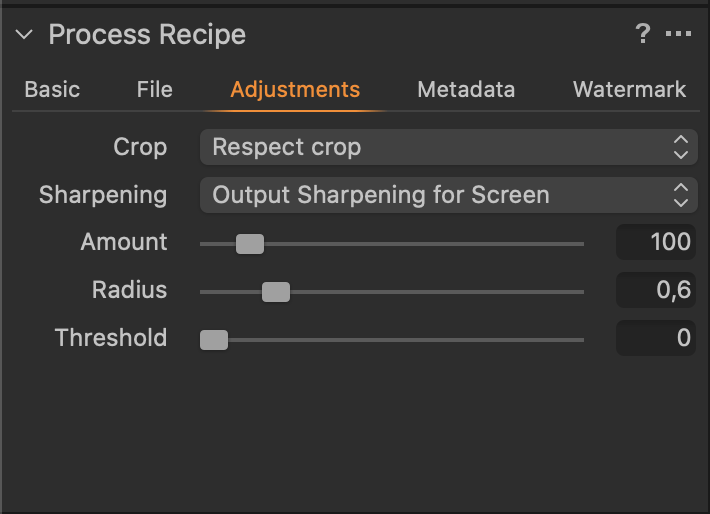
In the “Adjustment” tab – Export Adjustments
1. Crop – “Respect crop”
2. Sharpening – “Output sharpening for Screen”
3. An amount between 80 – 100

“Hello, my name is Henrik, I’m 46 years of age and I live in Denmark in a town called Odense. It is the third-largest city in Denmark, next to Aarhus and Copenhagen. During the day I work at the largest Telco business in Denmark as a Project Manager. By night I’m a passionate photographer who loves to challenge myself to different photo opportunities – but it all started with food photography.”




Hasibur Joy
June 5, 2020 @ 17:20
This blog is very helpful for me. I hope lots of people have benefited from this. I would like to see more photo editing blogs like this in the future. Thank you for sharing this.
olympuspassion
June 9, 2020 @ 17:06
Thank you for leaving your feedback. We really appreciate it, and we’ll consider it for future publications.