Olympus E-M1X – A Nature Photographer’s Perspective
Disclosure: I am an Olympus Visionary and as such, receive compensation from Olympus America. However, no compensation was paid for this review. I endorse their products because I truly believe in the quality of their gear.
Every photographer looks at a new camera release and asks, “Does this new model come with significant improvements from what I currently own, and does it suit my style and budget?”. With the announcement of Olympus’ new flagship model, the E-M1X, I was curious as to how well it fit my style as a nature photographer who primarily shoots landscapes and wildlife. Although designed to meet the needs of almost any style of photographer I wanted to provide “a natural perspective”.
An Exterior View
Time for a tour…
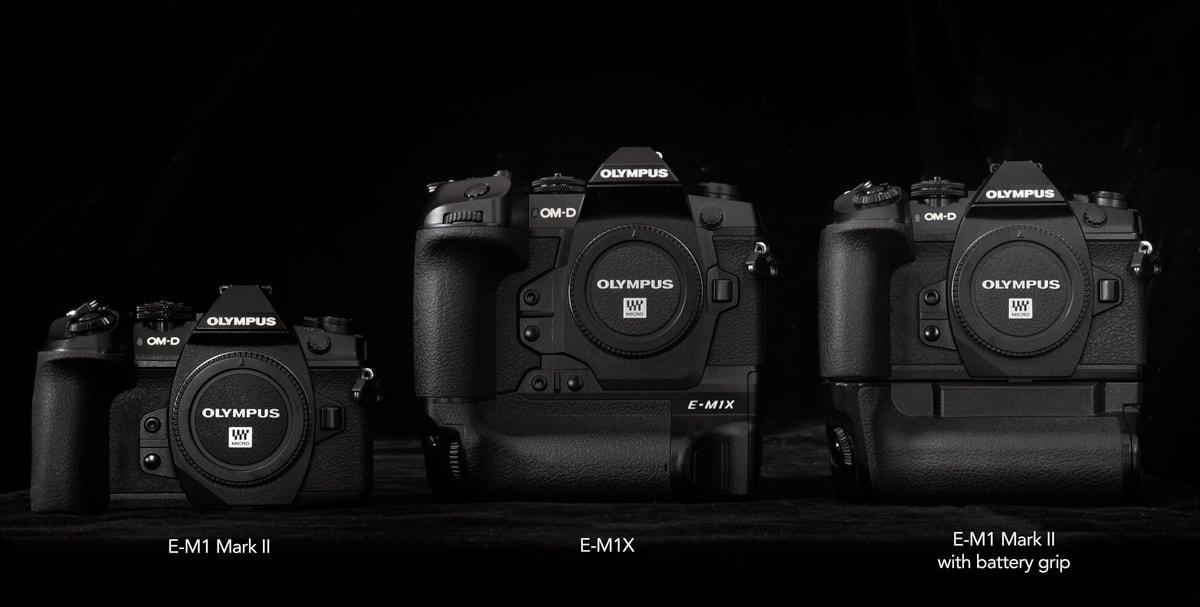
It’s only natural that comparisons will be made between the E-M1X and the E-M1 Mark II. After all, The Mark II was the flagship model and now the E-M1X is the new boss on the block. It must be stated however that this is not the successor to the Mark II, rather it is a new member of the OMD line-up of cameras, sitting in a new position alongside the previous series; E-M10, E-M5 and E-M1. It’s primary target audience is the professional photographer looking to capitalize on the advantages of the m4/3s mirrorless system. Let’s start our tour with that comparison.
Size
The E-M1X measures 144.4mm wide x 146.8mm high x 75.4mm deep. This makes it approximately 1.9x larger by volume than the E-M1 Mark II. However, for those who regularly use the battery grip on the Mark II, the E-M1X is only 9mm taller and 10mm wider. As far as mass goes, the E-M1X comes in at 997g, approximately 90g more than the E-M1 Mark II with the extra grip. Like many people I wasn’t expecting to see an integrated battery grip in the new E-M1X. However, since I spend a lot of time shooting with longer lenses I find the body to be nicely balanced, and, with a beefier grip, I never feel like the unit is going to slip out of my hands, especially since I hate using camera straps.
To summarize, you will definitely notice a size and weight difference between the E-M1X and the E-M1 Mark II. However, if you have been using the HLD-9 battery grip with the Mark II, then the differences are minimal.
Rear
One thing that has always impressed me with the Olympus cameras I have owned is the excellent ergonomics. The back of the E-M1X maintains the attention to detail of its predecessors and adds a few other features as well.
For those photographers who have been shooting with the E-M1 Mark II, there is both familiarity in the feature set on the back of the E-M1X as well as some definite differences.
- Fully articulating LCD – No surprise here. The articulating LCD has a solid feel to it, snaps into place nicely, yet is easy to pull out, even with thin winter gloves on. It’s a 3-inch touch screen with 1 037 000 dots, allowing a fair amount of touch-screen control (Shutter release, Touch AF (AF area selection, AF area size adjustment) AF targeting pad, frame forward/backward, magnified playback, Super Control Panel, Wi-Fi connection, movie controls).
- 2×2 switch – When the original E-M1 came out, I loved the 2×2 switch. It allowed for quick and easy access to multiple features. With the E-M1 Mark II the switch was reversed which made it more difficult to operate smoothly. I am pleased to see that on the E-M1X it once again toggles on the right side of the Fn button. It is elevated enough to provide a distinct feel while looking through the viewfinder, but has enough tension that it is unlikely you would switch it accidentally. It can also be programmed to become the On-Off switch which will appeal to many photographers. The switch positions are programmable. In Position 1 the front and rear dials will control exposure (in P, A, S, M), while in Position 2, the front dial controls ISO and the rear dial controls white balance (in P, A, S). You can also program it to operate Movie mode in position 2 which appeals to me since I often shoot short video clips.
- Multi Selector – This thing is awesome! Olympus calls it a multi selector, but I call it a joystick. It allows for very quick selection of your focus points while shooting. Rather than using the D-pad, just move the joystick. You can even move them diagonally. This is fantastic for bird and wildlife photography. The great thing is that there are two of them so it doesn’t matter if you are shooting in landscape or portrait orientation.
- Lock and C-Lock switch – Engaging the Lock will prevent accidental setting changes from the dials on the camera’s side (i.e. the vertical orientation dials). The side shutter release is also disabled. The custom lock switch allows you to program up to 15 features to lock out including the front and rear dial, OK button, touchscreen, shutter release, and most other buttons.
- Card Button – This allows quick control over which card will do the saving or playback.
- Menu Button – Compared to previous models the Menu button has now been moved to the left side of the body. This placement is taking some getting used to. I like having the most frequently used buttons in reach of my right thumb, especially if my left hand is balancing one of the longer lenses.
- Customization – Almost every dial, switch and button on the back, top and front of the camera can easily be customized. Up to 39 functions can be assigned to buttons with up to 24 functions assigned for movie recording. A new GUI in the menu makes button selection clear and easy.
Top
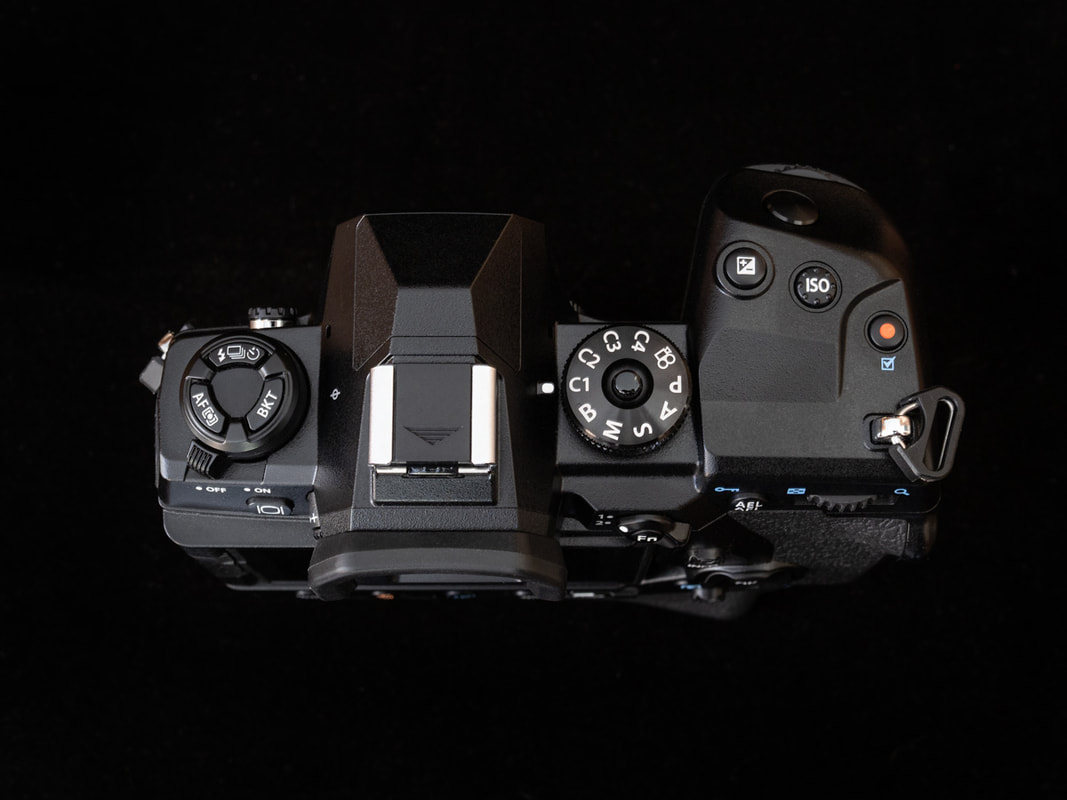
There some notable differences (and improvements, in my opinion) with the E-M1X.
- On/Off Switch – The On/Off switch is still on the left, but the switch is now oriented toward the rear which makes access easier. Three buttons top the On/Off switch that allow for quick access to metering modes, AF settings, shooting modes and bracketing.
- Mode Dial – The mode dial no longer has an iAuto or Art Filter settings (although the Art Filters are still available through the Super Control Panel). Those two spaces have been replaced with two great additions, a fourth custom setting (C4) and a Bulb mode (B) that allows quick access to Bulb, Live Time, and Live Composite. As a person who regularly uses Live Comp this is a nice change.
- ISO Button – I didn’t realize how much I wanted this button until it was placed right near the shutter release. I never use Auto ISO so being able to quickly change it while shooting is fantastic. It also has a distinct feel so it is unlikely to be confused with its neighbours.
- Embedded Dials – Both front and rear dials have now been embedded which should prevent accidental setting changes.
Right Side
The card slots are accessed using a new flip-up-and-turn release that should prevent the cover from opening accidentally. The dual card slots are staggered and both are now UHS-I,II compatible.
Within the gear menu there are several ways of recording onto the cards (Standard, Auto Switch, Dual Independent, Dual Same). As well, folders can now be created for saving or copying images.
A cable release port is also positioned on the right side just in front of the card slots.
Left Side
Two batteries (BLH-1, the same as the E-M1 Mark II) are held in a cartridge that slides out of the bottom left of the body. The cartridge is locked into place with another flip-up-and-turn release latch. Side access means that it is easy to swap out batteries even when the camera is mounted on a tripod.
Three port covers can be found on the left – a dedicated 1/8 inch mic port, headphone port, HDMI and USB ports. The batteries can now be charged directly using the supplied USB cable. This means you don’t need to bring your charger when travelling – a nice addition.
Viewfinder
The layout of the viewfinder is quite different than other OMD models and a pleasant change. No longer is any of the key info placed overtop of the image. Along a narrow strip at the bottom of the viewfinder you will find the battery level indicator, shooting mode (M, S, A, etc.), special settings (C1, C2, etc, Live Time, Live Comp), shutter speed, aperture, exposure compensation, level gauge, white balance, ISO, card capacity. This provides a clear, unencumbered view of your image. Pressing the Info button once brings up the histogram, which is superimposed over the image. Continued pressing reveals additional information (picture mode, larger level gauges, shooting mode). Unfortunately I haven’t been able to figure out how I can take a photograph of the viewfinder in order to share it with you. Trust me, it’s a nice improvement.
Menu System
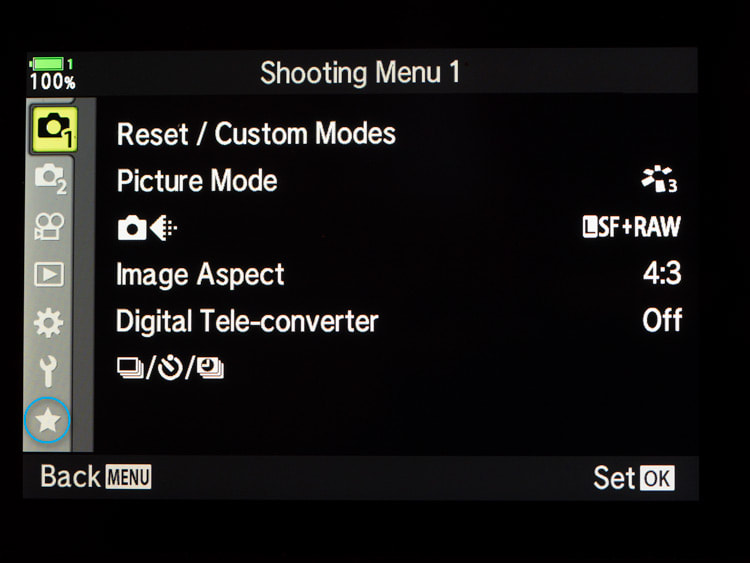
At first glance the layout of the menu system looks identical to the E-M1 Mark II. There are several new features added to the camera and therefore new menu items to go with them, but more importantly you can now build your own custom menus. During a meeting in January of 2018 the Olympus Visionaries were asked for suggestions regarding new features we’d like to see. Several of us suggested having a customizable menu that would store our most-used features. Olympus listened and made it better (and easier to use) than I could have imagined.
At the bottom of the main menu is the ‘My Menu’ item (a star icon). All custom menu selections are stored here in up to 5 separate menus with a maximum of 7 items per menu. As of this writing I have only added 2 separate menus. Adding items is easy. While scrolling through the menu, press the Record button and a prompt pops up asking you which of the 5 available ‘My Menus’ you’d like it added to. Select 1 through 5, press OK and the custom menu is populated with your choice. Very cool!
The Internals
The E-M1X has a 20.4 MP sensor with a new coating and is driven by the Dual TruePic VIII engine. This sensor delivers improved sensitivity especially at higher ISOs. The double TruePic VIII engines increases performance and speed in all areas and allows for the inclusions of the newest features that Olympus has built into the 1X. Start-up and wake-up times are also dramatically improved.
New Features and Improvements
Alright, here comes the fun part! Although I’ve photographed almost all types of subjects, I really wanted to know, will the E-M1X offer new and innovative additions or improvements that will benefit my landscape, wildlife and astrophotography? The short answer is, yes, but let’s have a look at some of those new and/or improved features.
Handheld High Resolution Shooting
Yippee! I have to admit that in the 3 years that I’ve been shooting with the E-M1 Mark II I have probably used the High Res mode only a dozen times or so. Being limited to only using it when mounted on a tripod was indeed a serious limitation for me. Not anymore! There are two high res modes – one for a tripod, and one hand-held. The regular high res mode provides an 80MP RAW image, while the hand-held mode provides a 50MP image.



The real test is “how slow can you go”? The image above was photographed at a shutter speed of 1/100s (ISO400, f/8). I’m very pleased with the results. The image below was shot at 1/3s using a GND filter!

I did try shooting a hand-held high res image of this scene at 1/2s, but I ended up with some ghosting around the grasses in the foreground. Of course, I’m not the steadiest person around, so I’m quite happy with the clarity I got at 1/3s. There are a few more high res shots in the gallery below.
Live ND
One of the reasons that I have stayed with Olympus for so long is the incredible innovations that they have brought into the world of photography (their dust reduction system, Live Composite, focus stacking, etc.). Add one more to the list – Live ND, and it’s cool!
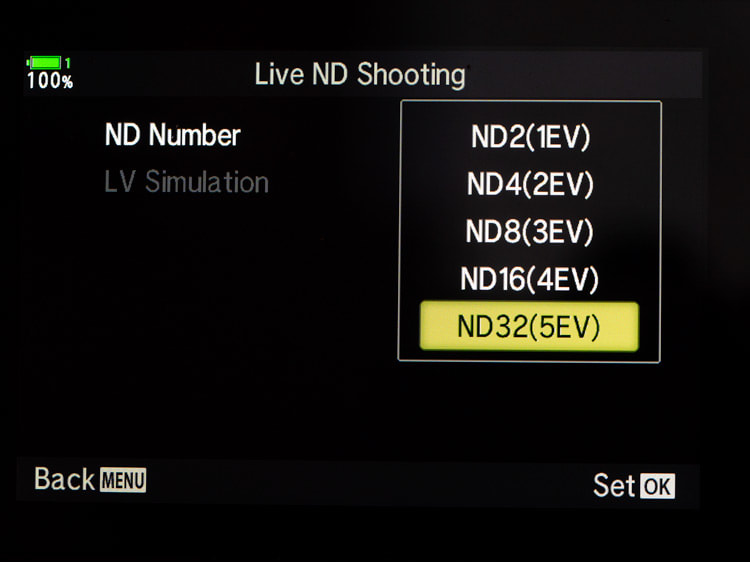
Through the magic of compositing, slow shutter speed effects are incorporated without the use of an actual ND filter. Within the menu you have the option of selecting 5 different ND steps from ND2 to ND32. During the process several images are composited to virtually extend the exposure time. Live ND is only available in Manual or Shutter Priority. The resulting image is in RAW.


The results are quite impressive. From within the menu you can also turn on LV Simulation where the slow shutter speed effect can be seen directly in the viewfinder or monitor. The exif data for the Live ND photo reflects the change in shutter speed even if you don’t physically change it. For example in the photo below (left) the shutter speed was 1/30s. With Live ND32 the shutter speed automatically dropped 5 steps to 1/2s.


Focus Stacking
Built-in focus stacking was introduced with the E-M1 Mark II and is now available on all recent OMD models. Based solely on personal observations there appears to be significant performance improvements with regards to focus stacking. The E-M1X appears to process stacked images faster and more accurately than the E-M1 Mark II. As well, you can now select the number of images to be stacked from within the menu, from 3 up to 15, rather than just 8 images as with other OMD models. I regularly use stacking in my landscape images in order to achieve greater depth so I appreciate those improvements.

Improved IBIS
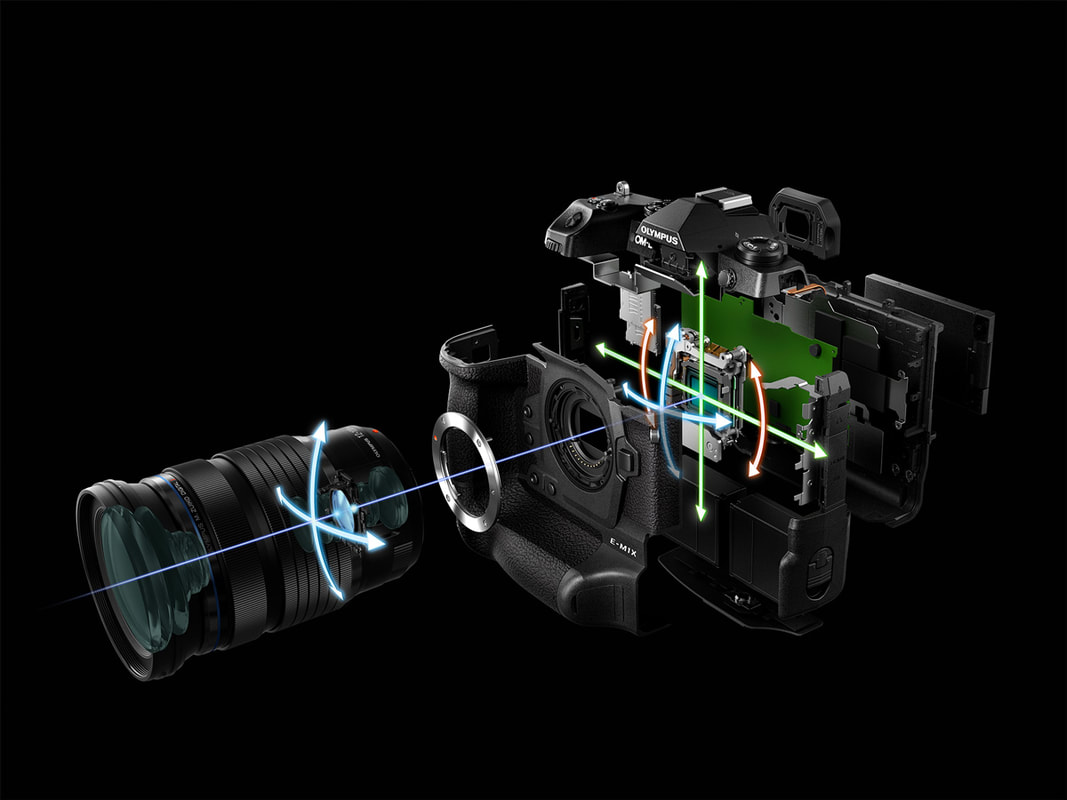
Olympus developed the best in-body image stabilization in the business and continues to make improvements in this area. A new gyro sensor provides up to 7.0 stops of image stabilization and up to 7.5 stops with the m.Zuiko 12-100mm f/4. This is fantastic in low light conditions for landscape photography or indoors, as well as for shooting wildlife.
As a simple experiment I photographed our local museum at night using the 12-100 lens. Since it was only faintly illuminated by some distant street lights I needed to set the ISO at 2000 in order to get a decent exposure and then proceeded to try out a variety of longer shutter speeds. The first image was shot hand held at 1 second, then 2″, 4″, 8″, 10″ and finally at 15 seconds. Of course, this is only one set of test shots, during which I was wearing thick winter gloves and standing in soft snow.
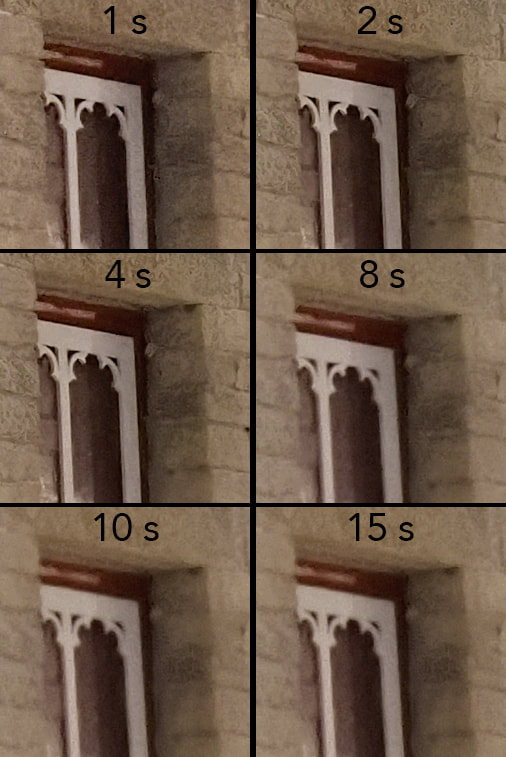
In my day-to-day shooting I would never go beyond 2 seconds without the use of a tripod and it would be quite rare to go even that long. A few years ago that would have been practically impossible. Now it’s easily achievable. Where I really want rock solid stabilization is while shooting birds from my canoe or kayak. Unfortunately that is not something I can test right now as I am ice bound in a cold Canadian winter. However, I have been able to do a bit of bird shooting with the E-M1X and I have been quite impressed.
Auto Focusing
When I’m photographing birds I want fast and accurate auto-focusing. The E-M1X has high-speed-imager AF. And it is definitely high speed. With the 300mm f/4 lens attached the auto-focusing is almost instant. I was pleased with the AF of the E-M1 Mark II, but this is even faster and more accurate, based on my experience with both cameras.
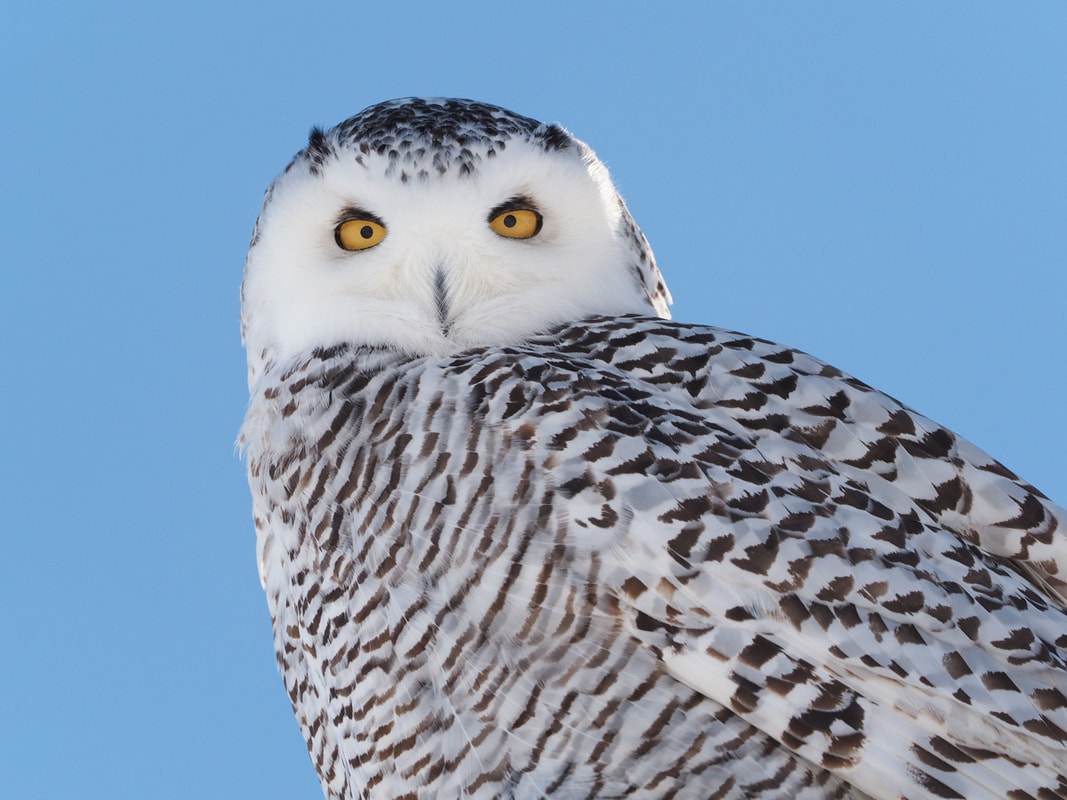
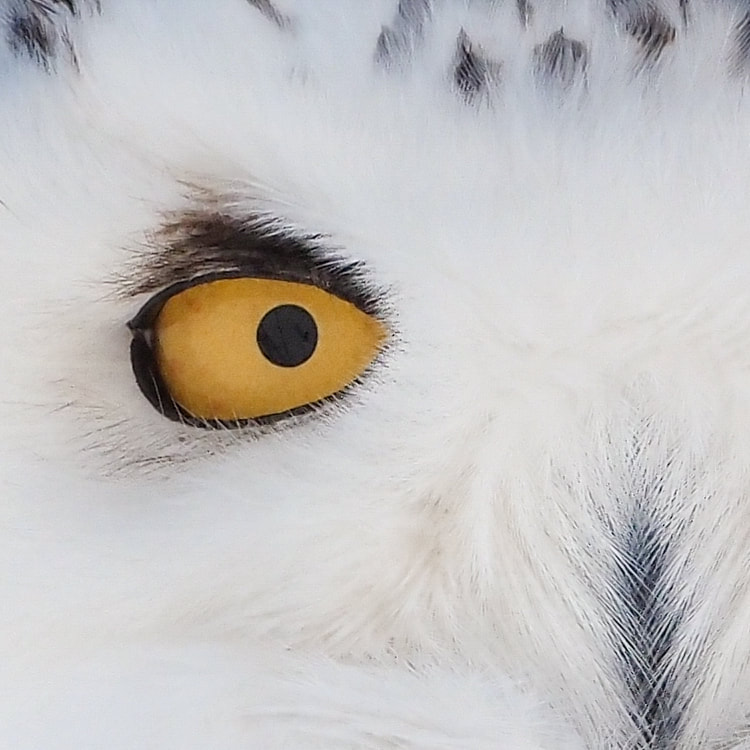
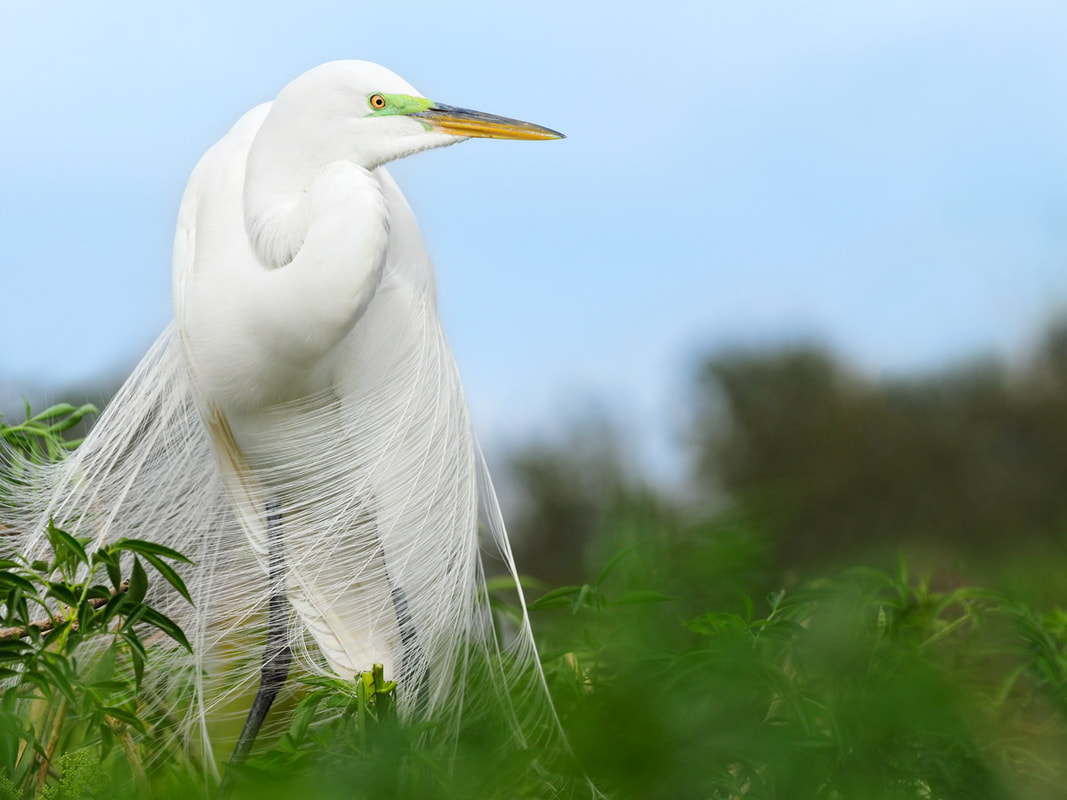
While photographing at the rookery in Venice, Florida the true advantage of the m4/3 system was reaffirmed. Most of the other photographers had their large lenses mounted on solid tripods and were stuck framing only one bird or nesting scene because changing positions quickly was practically impossible. With so much action happening at this location the E-M1X and 300mm f/4 is a combination that allows for quick and easy reframing of a scene, and the fast AF means a very high success rate.

AF Customization
A new feature is AF customization which allows you to set separate focus points in horizontal and vertical shooting orientations. This means that if you switch orientations you don’t have to constantly move the focus points. This not only saves time, but will likely save shots that you would have otherwise missed.
Custom AF Target Mode
Setting your focus points on an Olympus camera has always been easy. With the new joystick on the E-M1X it’s even easier. It maintains the same 121 focus points with both phase and contrast detection. A new 25-point group has been added which can be quite useful when photographing wildlife.
You can create your own customized targeting pads and assigned them to any of your custom mode settings (C1, C2, etc.). I tried to create one in the shape of PacMan, but unfortunately you are limited to a standard grid formation. A few examples are shown below.
Intelligent Subject AF
Intelligent Subject Detection AF is a new feature included in the E-M1X. (This doesn’t mean that the camera will automatically focus on the person with the highest IQ – although that would be a good party trick.) With C-AF+Tracking engaged the Intelligent Subject AF will detect specific subjects, focus on them and track optimal points as they move through the frame. A type of artificial intelligence is used called deep state learning. At present the feature will track planes, trains and automobiles. Since these are not subjects that I photograph I haven’t had the opportunity to test this feature out. I am hoping that at some point in the future it will be able to track birds, although given the organic nature of their movements I suspect this may be in the distant future.
C-AF + Tracking Performance Improvements
Speaking of tracking birds, one of the things I was most interested in is how well the E-M1X would do exactly that – track birds. Birds-in-flight photos are among the most challenging wildlife shots to get. With the E-M1 Mark II I had several successes when shooting our natural aviators. That said, I was hoping that my success rate would improve with the 1X. Over the short time that I’ve been using the new camera I’ve had three occasions in which to shoot birds in flight, and I’ve gotten quite usable images in all three situations.

Video
I don’t shoot a lot of video and it’s certainly my weakest area of knowledge when it comes to this (or any other) camera. However, I regularly shoot video clips of my wildlife encounters. The E-M1 Mark II produced excellent results, however there were often times where the AF was slow to respond or would drift. My experience with the 1X has been significantly better.
You can now set 4 AF target groups; single point, 9-point, 25-point and 121-point. As well you can adjust the AF tracking sensitivity and speed settings. The 1X can also shoot video at 120fps in full HD.
A Quick Rundown
The E-M1X has several other features worth mentioning, although I haven’t tried these out myself yet.
- 18 fps in Silent Sequential Shooting with Tracking (it maintains the 60fps without tracking)
- Anti-flicker shooting – The camera detects the frequency (flicker) of artificial lighting and activates the shutter at peak brightness to reduce exposure and colour differences.
- Improved Dust Reduction System
- Improved Live View Boost for night sky shooting
- Built-in Bluetooth
- Field Sensor System with GPS, Barometer, Compass, Temperature Sensor
- New Art Filter – Film Effect. As the Art Filter option has been removed from the mode dial, they are only available via the Super Control Panel or through the menu.
A Final Note
In the short time that I have been using the E-M1X I have been quite impressed with its performance and more importantly, the quality of images I was able to get. After a few days of use my muscle memory got used to the increase in size and found the camera to be quite comfortable, especially with the longer lenses. At a price of $2999 USD, this isn’t a camera that most enthusiasts will turn to. However, with the rugged build, great image quality, and increased performance it is definitely one that should attract many professionals who want the advantages of m4/3s system.






Peter is a professional photographer and educator living on Manitoulin Island in Northern Ontario. He regularly leads photography courses and workshops for novice and enthusiast photographers and travels across North America as an Olympus Trailblazer providing lectures and seminars on landscape, wildlife, and astrophotography. His work has been published in a number of magazines in both Canada and the U.S. and has been recognized for excellence on a number of photography websites. Peter is an avid outdoor enthusiast with experience in wilderness camping, canoeing and kayaking.








Silviu
June 22, 2020 @ 17:22
Superb review and photos. Well done!